
Some folks tell me I’m lucky that I live within a skip and a jump away from KR Training and I have to agree with them. Not only does KR Training offer a wide variety of excellent firearms training classes, but they also host a wide variety of top tier traveling instructors throughout the year. I’ve made it a habit to check their schedule of classes regularly and immediately book a seat in classes from instructors that are on my bucket list of instructors to train with when they are added to the schedule assuming my training budget and availability allows for it. This was exactly what I did when I heard John Hearne from Two Pillars Training coming to teach a couple of courses. Unfortunately, my budget and availability only allowed for one of the two classes. That class being a two-day class called Cognitive Pistol with Tactical Anatomy.
Attending a class taught by John Hearne has been on my bucket list for a while now. Parts of his work have been quoted in several courses I’ve attended over the years predominantly as it pertains to the effect novelty has on the human mind in the context of self defense. Yeah, we’re talking about literal brain science which he conveys masterfully in a way that laymen, like me, can understand. A good example of this work can be found in the first chapter of the book, Straight Talk on Armed Defense: What Experts Want You to Know. Needless to say, Hearne is one smart cookie. On top of that, the man can shoot. He’s an accomplished competitive shooter, a more than competent firearms instructor, and extensive experience as a recently retired law enforcement officer. While all of that is true, I’d describe him first and foremost as the proverbial high-tech redneck which I think is evident in his humble and personable demeanor coupled with the ingenuity demonstrated by the engineering employed in his traveling range set up.
The course is described as an intermediate to advanced level firearms training course with an emphasis on using a pistol under different levels of “cognitive load”. This is a concept that is often introduced and touched upon in some defensive firearms courses. It’s also an important component in force on force training scenarios, but isn’t the predominant focus – at least not directly in my opinion. The tactical anatomy component of the course dives deep into shot placement which is another topic that is commonly revisited in armed self defense courses. Neither of these components are exclusively unique to defensive firearms courses. However, the manner in which they are presented and explored is unlike anything I’ve experienced to date in my training. Attending this course put a new perspective on what I think I am capable of under stressful situations in terms of practical marksmanship. More specifically, it puts into context what “falling to the level of your training under pressure” means for me as the demand for cognitive processing increases. At the same time, it made the value of unconscious competence with a firearm a bit more concrete and tangible for me. I hope this after action report will make my takeaways more understandable to readers as it proceeds.
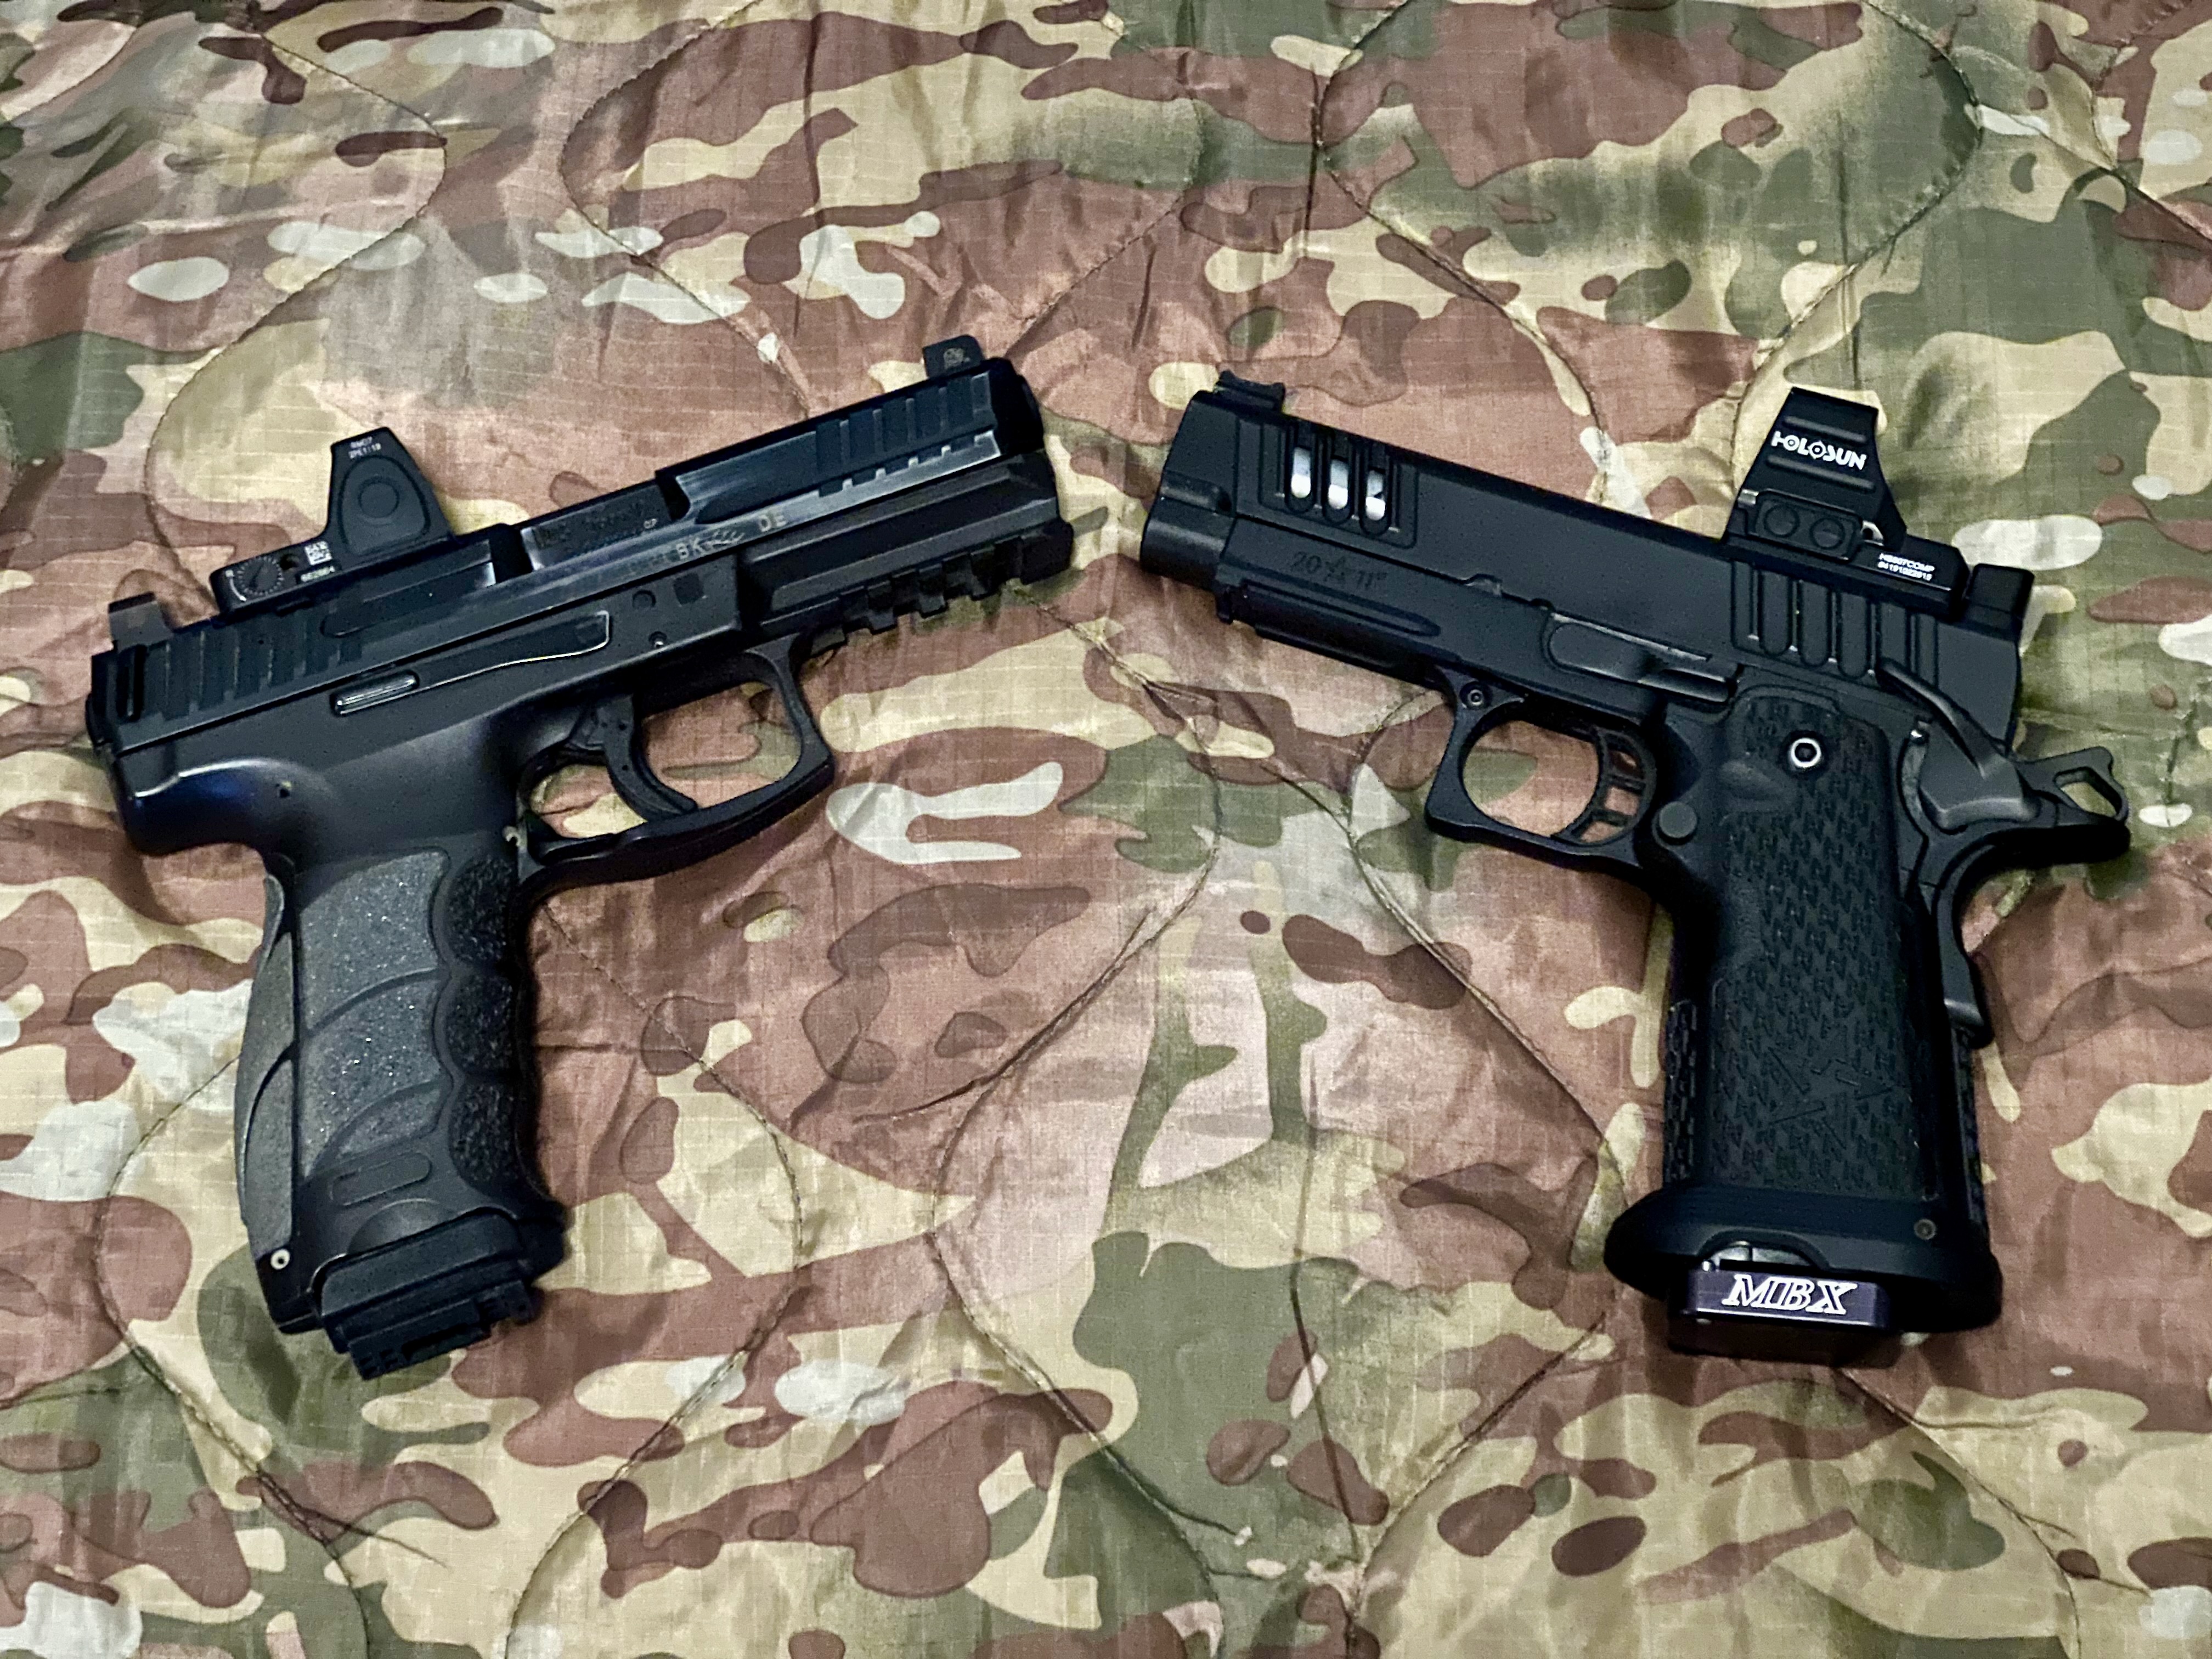
Before getting deep into the weeds, let’s cover the gear I used since it would undoubtedly be a question I receive if I didn’t cover it. The gear I used was my typical defensive carry with training ammunition comprised of:
- Gun: HK VP9 with a Trijicon RMR and XS Sights backup irons
- Belt: Nexbelt Titan EDC Belt
- Mag Pouches: Concealment Solutions Venom Mag Carrier x3
- Holster: Red Balloon Industries Hasten Cordura OWB holster concealed under a Carhartt jacket due to the cold weather
- Ammo: CCI Blazer Brass 147gr 9mm (approximately 650 in total)
Enough prelude, let’s get into it.
Day 1
The first day, which was bitterly cold, thankfully, started in the classroom with the safety brief and introductions from the students and followed by an introduction from John Hearne. As soon as introductions were concluded, we jumped straight into an overview of the course objectives and goals which aligned well with the description. I attempted to be a good student with the intention of taking good notes that I could review later and use as the basis for this after action report. While I still think I was a good student, the note taking didn’t last very long which happens either when I encounter a topic that is new to me which requires my attention in order to internalize it, understand it, and frankly keep up. The note taking also stops when I find the presentation of the material to be particularly entertaining. In the case of this class, I faced both.
Hearne’s delivery was masterful and the content, while familiar, dove deeper in specific areas than I had previously studied. Some of the things that stood out immediately to me about Hearne is that he was a certifiable grade-A nerd when it came to anatomy, psychology, and ballistics. Yet, he didn’t take himself too seriously. At the same time, I found myself laughing more than I probably should have at the dark humor memes used throughout the presentation which drove points home very effectively in my opinion. The memes were delicately balanced with insightfully wise quotes.
We spent a while discussing the concept of cognitive, or task load including the differences between natural and artificial load. In the context of armed self defense, natural load consists of the tasks juggled prior to, during, and after an encounter – marksmanship, manipulations, movement, threat assessment, target identification, background, legal, etc. Artificial load consists of tasks used as part of training and practice that better equip us for managing the tax placed by increased cognitive loads. At least, that’s how I understand it now as somebody who was just introduced to these concepts.

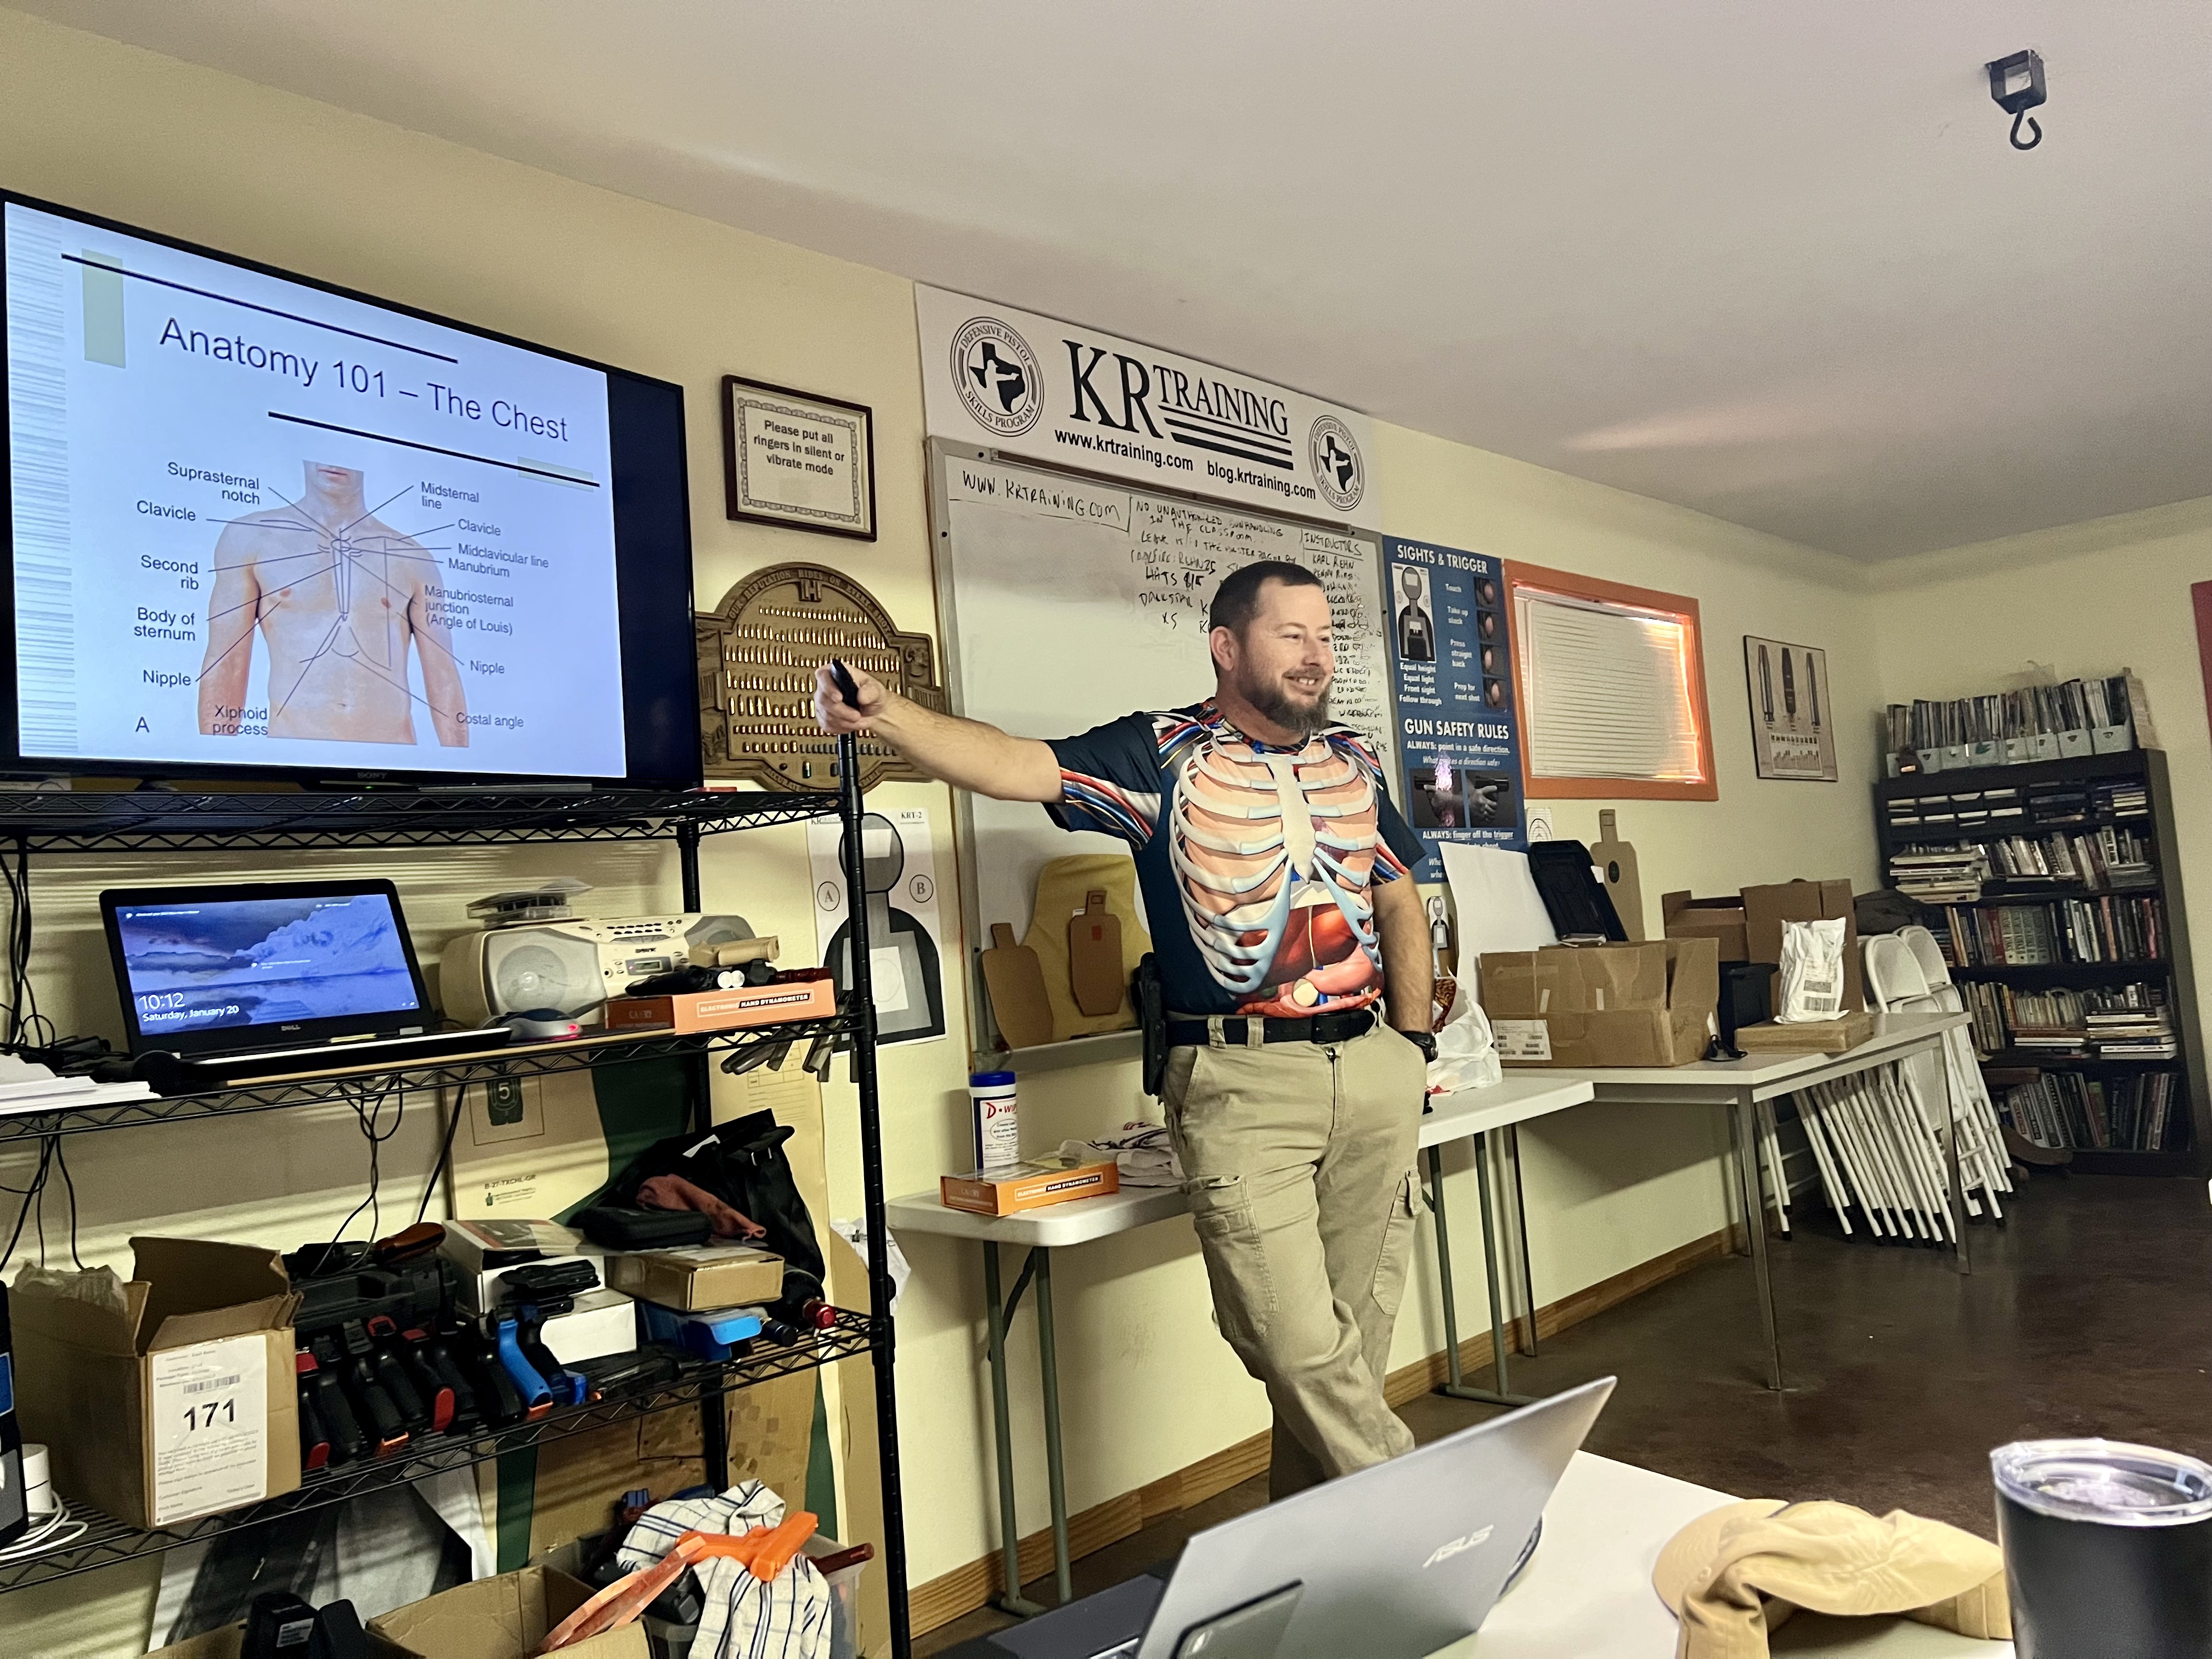
The lecture shifted quickly to tactical anatomy which began with a discussion of the two types of stops that can thwart a deadly threat: psychological and physiological stops (which have been discussed in previous posts). Anatomy matters when it comes to physiological stops which come in two flavors: loss of consciousness as a result of exsanguination or central nervous system (CNS) disruption.
CNS disruption is the fastest of the two, but requires a direct hit to the spine or an important part of the brain. The challenge with hitting the structures that result in CNS disruption is that they are small, well armored, and highly mobile. For those reasons, the target most self defense firearms training is concerned with is the high thoracic cavity (HTC) which is the area of the chest between the nipples, and between the suprasternal notch (top of the sternum) and the xiphoid process (bottom of the sternum) that houses the core of the circulatory and respiratory system. That approximately eight-inch area is much larger than the “eye box” (the least armored area of the skull where a projectile has the best chance of penetrating) and is far less mobile. In other words, the HTC is the easier target to hit.
The big “aha” for me was learning that not all hits in the HTC zone are equal since vascularity in that area decreases as we move to the outside from the center. Higher vascularity means faster exsanguination which translates into faster loss of consciousness and faster physiological stop. Another interesting bit was learning that a direct hit to the heart results in much slower exsanguination than a hit to the aorta or major artery. This is essentially the function of the heart muscle contracting and extending which opens and closes the perforation that slowly leaks blood into the pericardium resulting in much slower exsanguination than the high pressure leak from an artery into a much larger cavity. The way I wrapped my layman brain around this was comparing the slow leak in the heart to a slow leak in a perforated automotive tire and a popped artery to a popped balloon.
These pesky facts about the HTC highlight the importance of precision in armed defense encounters as impacts that are high and center of the HTC will lead to faster exsanguination and have a much higher chance including CNS disruption since the spine rests just behind the most vascular area of the HTC zone.
Equipped with an understanding of cognitive load and tactical anatomy the class headed out to the range where we started putting the theory into practice.

Initially we started with a bit of dry fire work on a B-8 repair center target that was placed over the “A-zone” of an armed silhouette target with a face. The dry work involved reacting to a turning get as a start signal and calling our dry hit on the paper. There were two things that were immediately apparent. First was that training on a flat range with an audible start signal can be deeply ingrained into the subconscious mind. I was well aware that the start signal was visually indicated by a target that would turn towards me and there would be no beep. Yet my response time to the first few go signals was awfully slow and I recall having to consciously tell myself using my inner voice, “you are supposed to go now”. The second thing I noticed was that it didn’t take long to reprogram the go response to the turn of the target. Although, I didn’t realize it until much later in the day that I hadn’t really reprogrammed anything. Instead, I was learning to quickly internally adjust the logic gate that flipped the go switch.
Live ammunition was added to the same drill shortly thereafter.
A little after that the B-8 repair center was replaced by a target that reminded me of an iPad visually and about the same size. The long sides of the rectangular target were oriented vertically. The inner “screen” rectangle area represented the preferred vascularly dense region of the HTC and there was a vertical 2” wide strip that ran from the bottom of the “iPad” up to the top of the edge of the paper through the top of the iPad. This strip represented the spine of the target. Working on this target illustrated how CNS disruption was possible while working the HTC with prejudice towards the vascularly dense region.
As the day progressed, additional decisions were delegated from the instructor to the student which added to the cognitive load. The first of those decisions was the “what” to do when it was time to respond to a threat. The “what” depended on the number of illuminated LEDs in a box that was placed on the ground near the targets which also served as the visual start signal. One LED meant the response should be a single shot to the headbox. Two represented a response of two HTC hits. Three LEDs represented a draw to low ready with a verbal command. We were also presented with a stop constraint which was also a visual signal represented by the targets turning away.

Things got even more complicated and interesting as more LED boxes were added to the range which forced the students to broaden their awareness as the “what” go signal could come from different locations. A possible signal location that was introduced later was located behind the firing line. The interesting thing about this is that it was possible to give the students multiple “what” signals. This resulted in students responding differently to their target depending on which signal they first perceived. Also some students started later as they may have been scanning a part of the range that included a signal box that was not illuminated while other students were looking at another part of the range that had an illuminated signal box. Different decisions being made at slightly different times was additional range chaos that placed an additional cognitive load.
At some point while adding cognitive load to the drills using the LED signal boxes, we did a few head to head challenges on steel where two students would compete by reacting to the LED signals and placing a hit on the steel target that corresponded to the color indicated by the signal box. It was a fun competitive challenge that resulted in a fair bit of unplanned and unexpected synchronized shooting where determining the winner was anything but objective.
After we wrapped up with the fancy lights and turning targets for the day, we spent a few moments working with the three dimensional targets Hearne set up for us. The targets were interesting because they didn’t have any marked “A” zones and actually masked an anatomical region paper target that was placed behind the three dimensional torso and head shell. Working drills on these targets which were engaged from different angles allows the students to learn where to place their point of aim on the target to hit vital anatomical structures depending on the target’s orientation.


There was a brief amount of work done on a moving target between the three dimensional target work, but before proceeding further to the last thing we worked on which was a drill Hearne dubbed, assuming memory serves me correctly, the Furball drill. The light version of it. The drill involved setting up six targets which were labeled without knowledge of the student that would be shooting the drill. One target was on a cart whose movement was controlled by a different student. An LED signal box was used to inform the student who was about to start the drill the value of the label of the targets that were threats before giving an audible start signal with a 30 second par time. The drill involved identifying and engaging one or more threats while maintaining muzzle awareness and avoiding putting holes in non-threatening targets. There was a lot going on and a lot to process in this drill.
At the end of the first day, I was completely mentally exhausted. The physical demands of the day were minimal, but the mental demands were abundant.
Day 2
Readers will have to forgive me as my recollection of the sequence of events during the day is a bit fuzzy. I suspect this is largely due to the mental exhaustion that day two piled on an already exhausted mind that hadn’t fully recovered from the first day. There will be a little skipping around combined with several attempts at summarization for the sake of brevity for a post that is already fairly long.
One of the first things I recall doing was performing a modified 5 Yard Round up against the turning targets. More specifically, on the head of the turning target. The drill consists of five strings all with a 2.5 second par performed from a distance of five (5) yards as follows:
- Draw and fire one (1) round
- From the ready, fire four (4) rounds
- From the ready, fire three (3) rounds using the primary hand only
- From the ready, fire two (2) rounds using the secondary hand only
The drill is scored by the rings of a B-8 target which, unbeknownst to us, the students, was printed on the other side of the angry face target. A challenge chip, with a phrase reading something to the effect of it being awarded for being able to perform a stupid human trick at a high level, was awarded to students who scored a 95 or better. I managed a score of 85 because I ran out of time before I could send the final shot on the final string which frustrated me to no end. Oh, well. Those things happen.

The day involved more work on the turning targets, but the cognitive load was cranked up again. The three LED signal boxes were replaced with four LED signal boxes which provided a fourth response option – walking away. Another change that was introduced was splitting the what and the when inputs into separate signal boxes. Nothing changed with the what box, but the go signal required exactly three illuminated LEDs in order to initiate a response. Crossing signals happened a fair bit where the challenge response on a what box was interpreted as a go signal and the no go illumination on the when box was used for the response. It is possible that some of the “crossed signals” were misunderstood drill instructions which got lengthier and more complicated. Regardless, I took complex drill instructions to be another task that added to the cognitive load.
Another head to head challenge on the steel targets took place using the four LED signal boxes this time. I was once again amused by the frequency of synchronized shooting which seemed more frequent on the second to me. I suspect the processing and cognitive load of challenge was at play here even though I don’t understand how it would be. It may have been a fluke, but I have to wonder if Hearne has observed this occurring in other instances of the class and if he has an explanation for it.
After getting intimately familiar with the four LED signal boxes, the students ran the full flavored version of the Furball drill. The setup was pretty much the same as the light version with a few differences. The first difference was the use of two (2) four LED signal boxes. One box represented the number value of the label that indicated the threat targets while the other box provided the color of the label that indicated the threat targets. This increased the discrimination needed to identify the threat targets. Another difference is that the time limit was reduced from 30 seconds to 15.
At some point, the class worked on Hearne’s version of Tom Givens’ Casino Drill called the Mississippi Casino Drill. The most glaring difference between the Hearne’s version and the original drill is the round count which is 15 rounds instead of the original 21 rounds distributed across three magazines. The target for the drill consists of six different colored shapes, which are approximately the same size as an “A” zone, numbered from one (1) to six (6). On the signal the targets are engaged in numerical sequence with the number of rounds indicated by the number on the target. To do this successfully, the shooter must keep count of the number of shots fired on the current target as reloads will be required in the middle of a target engagement. The point of the drill is to force the shooter to think with the gun in hand. In order to prevent improvement through memorization things can be changed up by changing the distribution of rounds from five (5) per magazine to one magazine with four (4) rounds, one with five (5), and one with six (6). Ideally, the magazines are staged in random sequence in the shooter’s magazine pouches so they have no way of knowing the round count of the current magazine being used during the drill A dummy round can be randomly added to force a random malfunction clearance which increases the difficulty of the drill. One final change that be added is to roll two (2) six (6) sided dice right before immediately starting the drill. One die indicates the number of the target in which to begin the drill on. The other die, modified with labels reading “up” on odd number sides and labels reading “down” on even number sides, indicates the direction of numerical sequence to engage the targets in. Given that the shooter doesn’t know how many rounds are in which magazine, when they will encounter a malfunction, and what the engagement sequence will be until the last possible moment, it is impossible to pre-load the motor program prior to the drills initiation which places a cognitive load on the shooter each time the drill is run.
Some class time was devoted to understanding different ready and movement positions along with their applications in defensive encounters. Namely high ready, low ready, temple index, and position Sul. We also ran a few variations of a snake drill which were modified for safety to experience moving between positions. A snake drill involves moving with a firearm in hand in a wave pattern between a line of “people” while switching between ready and movement positions as appropriate. The focus of the drill to maintain the muzzle averted away from the “people” as the drill is performed. A variation of this drill involved students standing in a line about an arm length apart while the student who is performing uses an inert blue training gun while “snaking” their way from one end of the line to the other using the movement position while moving between the students and the corresponding ready position as move past a student before starting to move between the next pair of students.
The last thing I recall working on was spinning the Farnam rotator (or spinner) target. The target is a steel target consisting of two plates that can be spun when hits are timed in such a way that they increase the rotational momentum sufficient to cause the targets to spin around the axle they are mounted to. Timing the hits correctly requires continuous conscious thought, or cognitive load. I found getting the initial rotation to be harder than it looked, but keeping it going felt much easier even though the rate of fire was notably faster.
Closing Thoughts
One of the things I’ve learned while increasing my pistol marksmanship abilities is that our minds can really only focus on one thing at a given time. This single fact is what makes shooting a pistol well, which is a simple thing to do, in dynamic environments at a high level a very difficult thing to do. This is why competitive shooters devote so much effort on building a subconscious stage plan before shooting a stage in a match. They are in essence pre-loading a motor program with focus queues so that the stage can be executed on autopilot using every bit of every skill they have developed in training and practice. While that’s all well and good, pre-loading a motor program is a luxury that is rarely found in self defense scenarios. While some things can be done to pre-load pre-made decisions to reduce reactionary gaps, mental focus will shift quickly as a defensive encounter evolves. Hearne’s Cognitive Pistol class exposes students to that reality.
The exposure to increased cognitive load while shooting is something that I had only previously experienced in force on force training. One of the things that makes this class unique and I found quite valuable was the volume of drill repetitions under cognitive load which is much larger than what one would experience in a force on force course. That volume really drives home the effects that cognitive load has on one’s shooting ability. Additionally, it provides some practice tools, like the Mississippi Casino drill, that can be employed to develop and improve one’s ability to deal with cognitive load while operating a firearm. In other words, the class, while worthwhile and valuable in and of itself, is also an excellent supplement to force on force training.
Armed defense practitioners who have their fundamentals squared away are, in my opinion, the folks who are best suited for and would benefit from this class. If this is you, then I will encourage you to take a look at John Hearne’s EventBrite page to find a seat in an upcoming offering of the Cognitive Pistol with Tactical Anatomy class.


3 responses to “Two Pillars Training Cognitive Pistol with Tactical Anatomy”
I am one of those people who call you lucky for living close to the A-Zone Range. It is a 2-hour drive for me, but worth the time. 😁 (Already signed up for Mas Ayoob’s class in August).
Super write up (as you always do)!
I took John’s class last year. From the pics, he’s done some serious upgrades on his light boxes – no doubt, in a devious effort to screw with your mind (I mean, impose a greater cognitive load on the student).
One typo I noticed in reference to HTC vascularity: “vascularity in that area decreases as we move from the outside from the center.”
Regards
Good eye. Thanks for the catch.