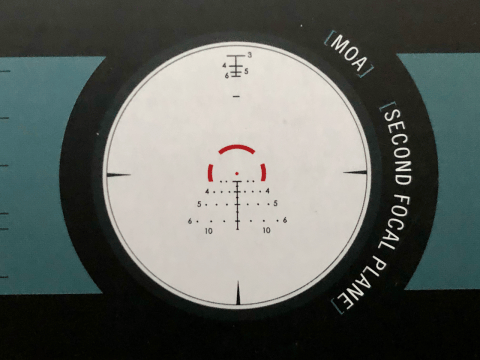
I promised this in my Vortex Optics Diamondback 3.5-10×50 riflescope review: a review of the Dead-Hold BDC reticle that came with it. Unfortunately, this is one of those reviews where keeping my biases in check will take some effort. I want to give it a fair, objective shake. I suppose the best way to approach that challenge is to measure the reticle’s effectiveness against the applications it is marketed for. As I do that, I will do my best to disclose the opinions my personal biases may have tainted.
What Vortex Claims for the Dead-Hold BDC Reticle
According to Vortex, and paraphrasing, the reticle features a customized dot design that helps eliminate guesswork on holdover and windage corrections. Again paraphrasing, this reticle is good for hunting and shooting at varying ranges where estimating holdovers is a concern. That is a broad claim. Moreover, it’s similar to the marketing claims for plenty of other bullet drop compensation (BDC) reticles. Keep in mind that this reticle design is exclusive to the Vortex Diamondback riflescope line. Those are good quality, value-priced scopes, after all. That doesn’t mean I won’t be critical of the reticle. Still, keep it in mind when comparing its features to the reticles in competing products.
First disclosure: I’m not a fan of BDC reticles. They certainly can help with holdovers and reduce guesswork. Even so, I find they leave a lot to be desired for precision applications. For that reason, I hold a strong preference for technical or Christmas tree style reticles. Therefore, I share this so readers know of one strong bias I am attempting to keep in check. I hope they read this with a critical eye. Thankfully, Vortex doesn’t market this reticle for precision applications.
What the Dead-Hold BDC Reticle Is
I would describe this reticle as a duplex crosshair reticle with some flair. In short, a duplex reticle is a fine crosshair. A thin vertical line and a thin horizontal line cross in the middle of the field of view. In turn, each line connects to a wider post at the outer edge of the field of view. The point where the fine line joins the wide post provides a reference point for the largest holdover values.
Out from the center along the horizontal line, in either direction, are three vertical hash marks. Specifically, they are evenly spaced at 2 MOA between the center and the outer post. These hash marks reference 2, 4, 6 and 8 MOA windage holds. The 8 MOA mark is the point where the fine line meets the wide post. From the center intersection down along the vertical line, we find three hash marks. The first measures 1.5 MOA, the second 4.5 MOA and the third 7.5 MOA from the center. The point where the fine line meets the bottom post sits 11 MOA from the center. These vertical reference points serve as elevation holdover estimates for easy-to-remember distances. Of course, the value of those distances depends on the cartridge and the zero distance.

Ranging With the Hash Marks
While the primary function of the Dead-Hold BDC’s hash marks is to provide reference points for holdovers, they serve a secondary function. You can use them to measure targets of a known size at a distance. The MOA measurement and the known size then give you an estimated range. All in all, the hash marks add a lot of utility and value over a plain Jane duplex crosshair reticle.
Can you feel the “but” impatiently waiting to be typed out? Don’t worry, it’s coming. Before that, let’s first look at the distances represented by the hash marks on the bottom half of the vertical line.
The Six Cartridge Classes
The Dead-Hold BDC reticle’s manual provides six different distance reference tables, each with a suggested zero distance for the crosshair center. Vortex’s idea is that many cartridges have trajectories similar enough to share a class. Each class then shares a distance reference and setup. The classes are:
- High power big game rifles, such as the .30-06, .308 and .270 (Class A)
- Magnum big game rifles, such as the .300 Win Mag and 7mm Rem Mag (Class B)
- Small caliber, high velocity varmint rifles (Class C)
- Modern black powder rifles (Class D)
- Rimfire .22 LR rifles (Class E)
- Slug shotguns and traditional black powder rifles (Class F)
Sounds magical, doesn’t it? Well, let’s look at those distances before sending the jury off for a verdict.
| Aiming Reference | Class A | Class B | Class C | Class D | Class E | Class F |
|---|---|---|---|---|---|---|
| Center | 100 | 200 | 200 | 100 | 50 | 50 |
| 1st hash | 200 | 300 | 300 | 125 | 60 | 75 |
| 2nd hash | 300 | 400 | 450 | 200 | 90 | 100 |
| 3rd hash | 400 | 500 | 550 | 225 | 120 | 125 |
| Bottom post | 500 | 600 | 650 | 140 |
Where the Dead-Hold BDC Reticle Falls Short
Okay. I admit it. I’m having a hard time holding back my bias. Indeed, it’s evident in my not so subtle sarcasm and whimsy. However, here is the thing. These tables make generalized assumptions about muzzle velocity, the projectile’s ballistic coefficient and scope mounting height. While these are fair generalizations and distance estimates, there is a fudge factor that would be unwise to ignore. In particular, that applies to shots that call for the 3rd hash mark or the bottom post. Depending on the size of the target, that can mean the difference between a good hit and a miss. Even worse, it can mean a bad hit.
Memorizing Distances
The other drawback of the Dead-Hold BDC comes after you work out the best zero distance and the elevation estimates. You still have to memorize them or write them on a reference card. Of course, some may find this easier than memorizing MOA drop values at different distances and using a technical reticle. However, it seems like a lot of mental mapping to me. The exception is when the estimates line up as nicely as they do for class A and class B firearms.
Windage Holds
For the sake of argument, let’s assume it’s easier for the average shooter to commit estimated distances and the corresponding elevation hash to memory. With that in mind, wouldn’t it make sense to space the windage hashes for memorized wind speeds as well? Maybe. Maybe not.
I have a hard time understanding why Vortex takes one approach for bullet drop compensation but another for wind drift. To use the Dead-Hold BDC’s windage hashes, the shooter has to make a wind call. Then they work out the MOA hold for the target’s distance. That means, for example, recalling DOPE (data on previous engagements) values from memory, referencing DOPE notes or cards, or using a ballistic calculator. In my opinion (bias alert), recalling the MOA drop and drift for a 300 yd target in a 7 mph wind is easier. In contrast, recalling the drift and then the matching hash for the same shot is harder. But, again, that’s just me and my bias.
No Combined Holds
One final complaint I have with the Dead-Hold BDC reticle is the lack of combined elevation and windage dots toward the bottom. Those are the dots that create the Christmas tree effect in other reticles. Admittedly, my bias is showing again, but that’s not the whole story. These marks also appear in BDC style reticles like the Vortex AR-BDC3 reticle. In particular, they are extremely useful for large combined elevation and windage holds.
Let’s assume we have a 500 yd shot to take with a .308 rifle, a class A firearm, in a 10 mph wind. In that case, we would have to use the bottom post as the elevation reference and then hold about 4.75 MOA for wind. That puts the point of aim well out in the open space of a bottom quadrant, depending on the wind direction. Granted, the hashes take some of the guesswork out of the combined hold, which makes it way better than good ole Kentucky windage. Even so, this type of hold isn’t easy, especially under stress.
Being Fair to a Value Scope
One might be asking, “Is Uncle Zo being unfair? After all, Uncle Zo said Vortex designed the Dead-Hold BDC reticle for value-priced scopes.” In short, the answer is yes. I have been a little unfair. I can’t help it. Talking about reticles just gets me riled up.
Let me take a step back and consider this reticle in the context of value-priced hunting scopes. The Diamondback scope I acquired with this reticle is one of them. For the most part, these are lightweight scopes with a 1 in main tube and a magnification range around 3-9x. In fact, from what I’ve gathered, the vast majority of scopes at this price point come with a plain duplex crosshair. Compared to that, the Dead-Hold BDC reticle is at least an order of magnitude better in functionality and utility. For more on what to look for in a hunting reticle, see my reticle considerations for hunting.
Closing Thoughts on the Dead-Hold BDC Reticle
Yes, I’ve ranted a bit. Okay, I’ve ranted a lot. However, you can use the Dead-Hold BDC reticle very effectively to place good hits on game animals and targets. In any case, my only caution is to take the time to learn the trajectory of your typical loads. Finally, map those drops to the elevation hash marks before shooting near the far end of the reticle’s design range.