
Failures happen. That’s reality. It’s a function of probability. The more that one practices, trains, or competes with a firearm, that firearm or an attached accessory will eventually experience a failure. However, there are ways to reduce the likelihood, if not otherwise completely mitigate, the chance of experiencing a failure. As one can infer from the title, this post is going to cover the things one can do to avoid experiencing a mounting failure with a pistol mounted optic. A failure I recently experienced at a recent local USPSA match with the Trijicon SRO mounted on the H&K VP9 Match.
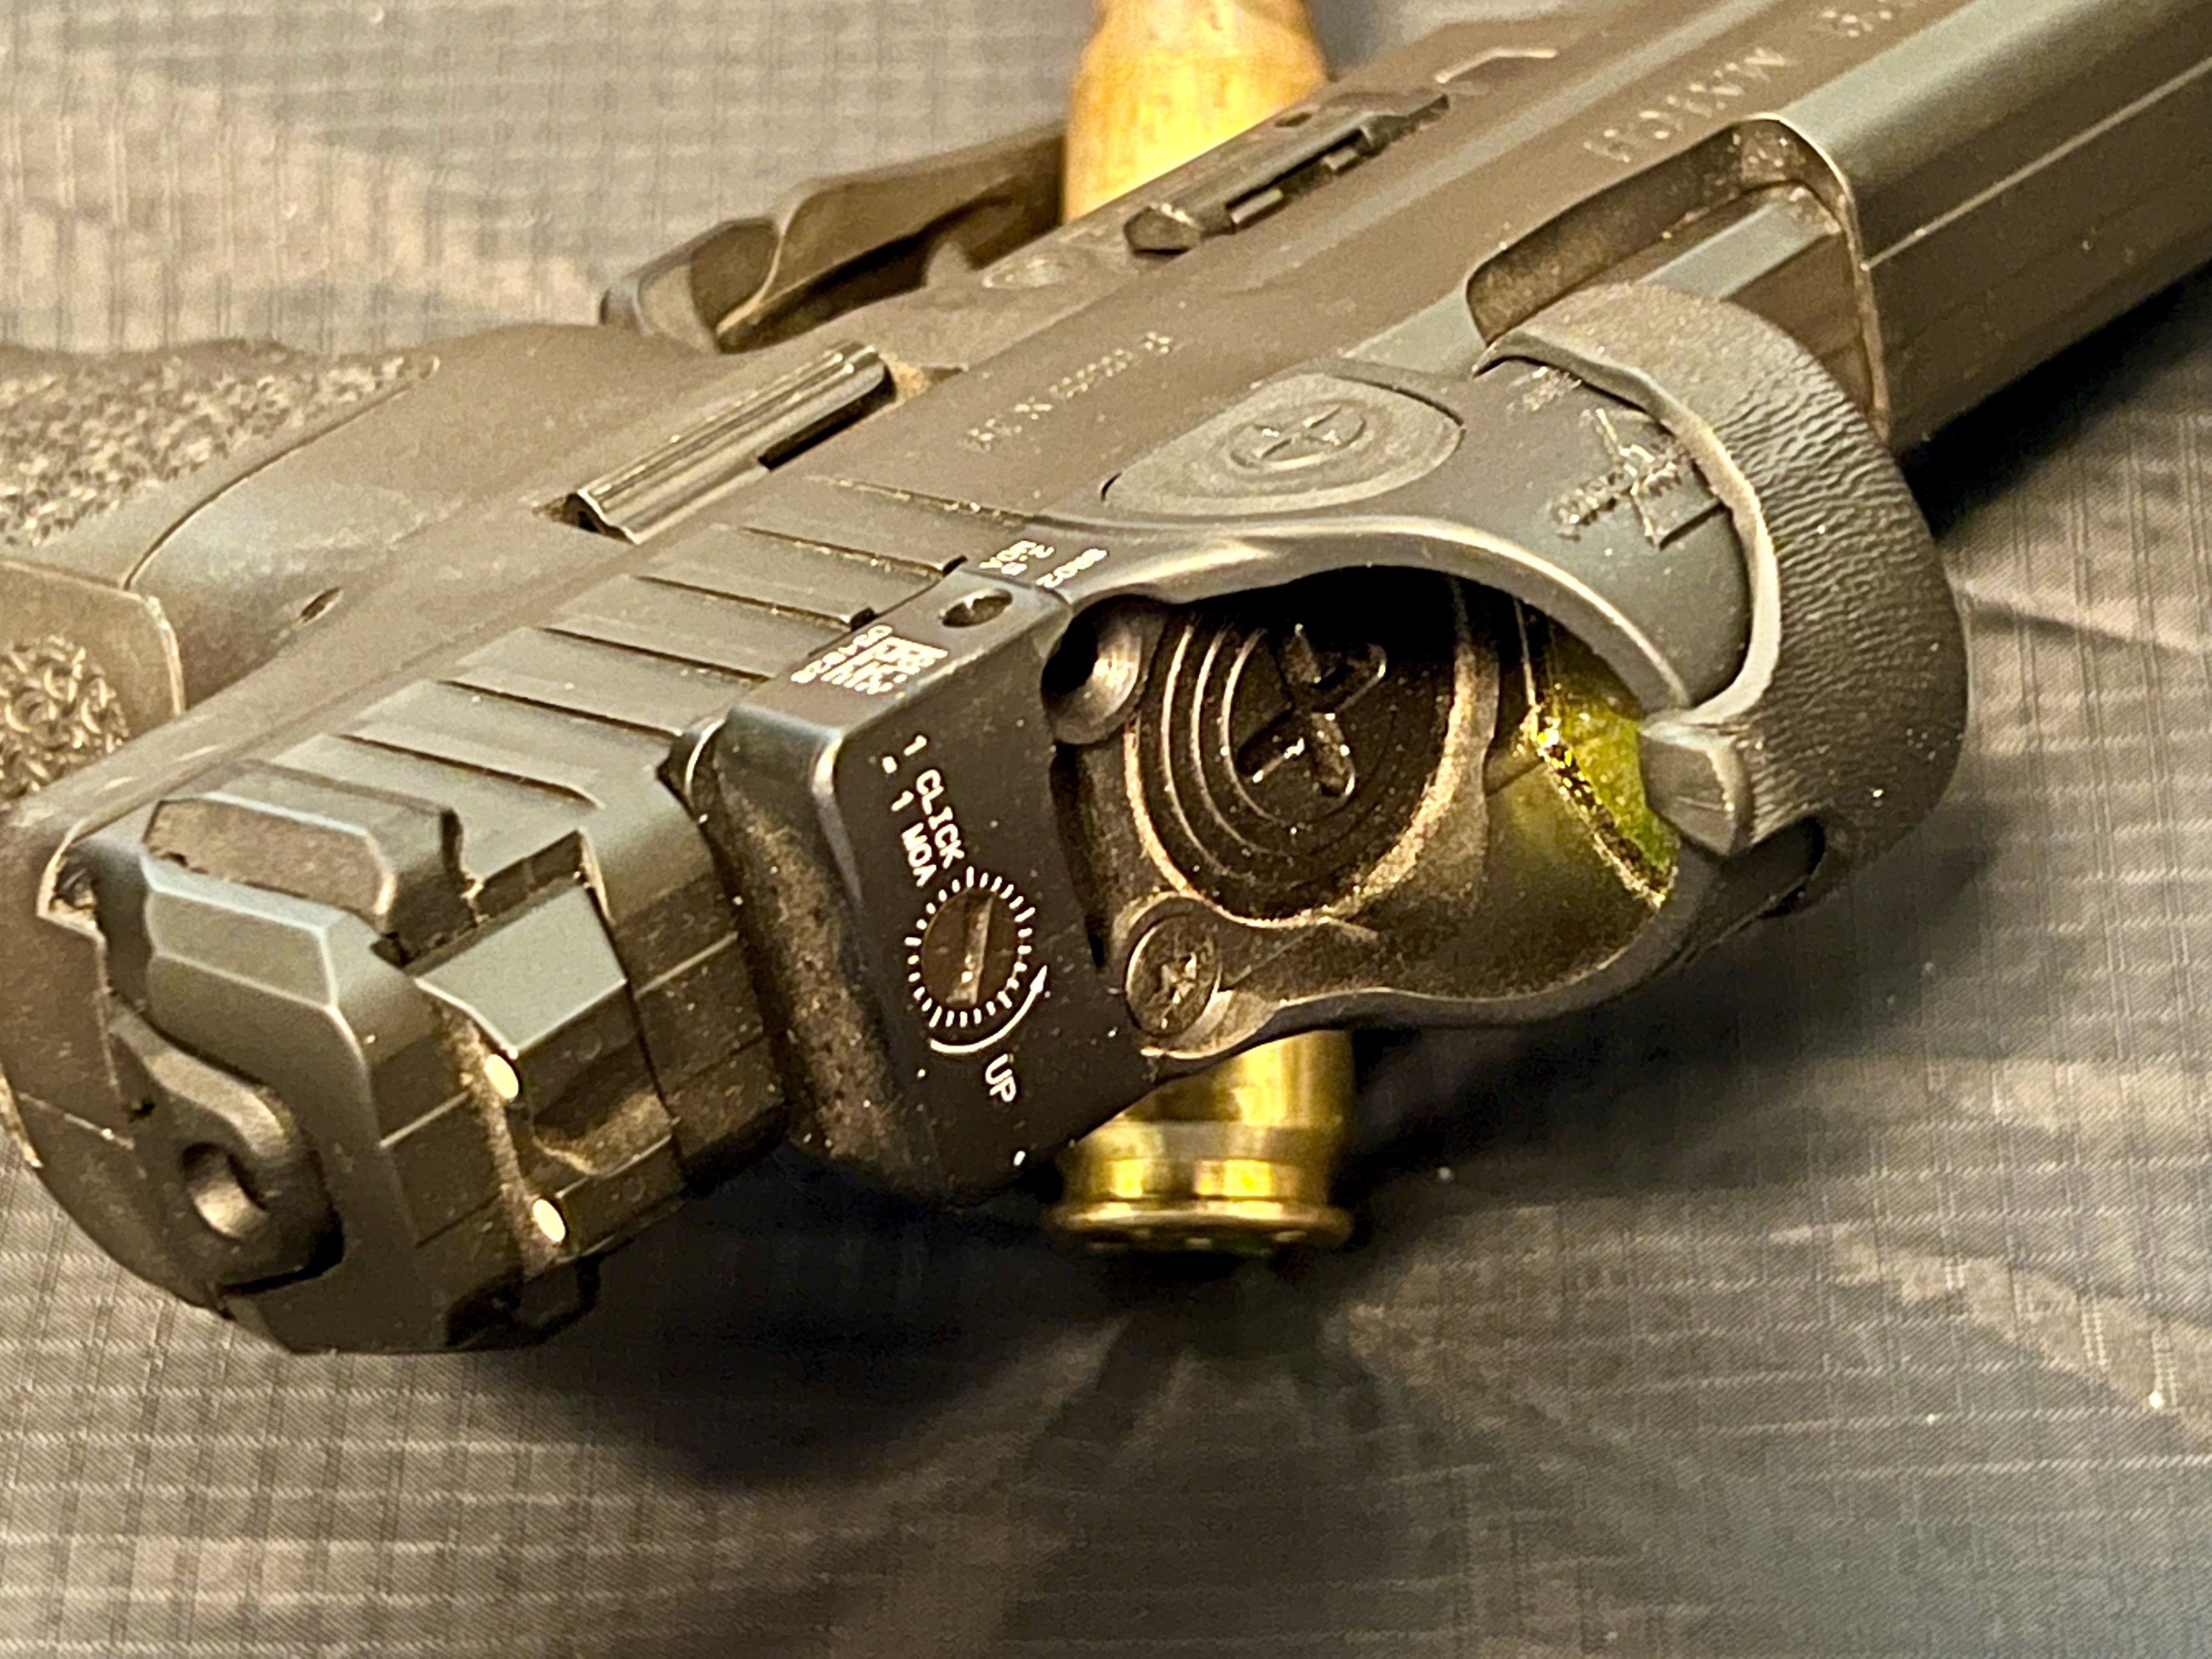
Here is the back story. Last weekend, I went and shot a local USPSA match. This was nothing out of the ordinary. I packed the range bag the night before and grabbed the VP9 Match, which has been the usual suspect for participating in the carry optics division, in the morning. When I arrived at the match, I put on the competition belt, removed the target focus trainer from the SRO, function checked the VP9, adjusted the illumination, and holstered the VP9 Match at the safe table. Everything checked out. After the match, as I started putting the competition gear away, which is essentially the same process in reverse, I noticed the SRO was very loose when I went to power down the SRO. Upon closer inspection, I noticed one of the SRO mounting screws was missing and the remaining screw had walked out a bit. I suppose I was lucky the optic didn’t fly off during a stage as that may have resulted in a broken optic.

Mounting failures aren’t rare, but they are somewhat uncommon when optics are mounted properly. Something I recall doing twice on this particular pistol with this particular optic. The first time was when I initially installed the SRO on the VP9. The second time was after finding the optic loose while attending Ben Stoeger’s class earlier this year. I’m beginning to think the factory optic adapter plate might be slightly out of spec, so I’ll probably replace it with one from C&H Precision before I remount the SRO properly a third time.
Enough of the preamble, let’s get to how to avoid mounting failures which begins with quality hardware. I can’t stress the importance of good hardware enough. A high quality adapter plate with the proper mounting footprint is important for optics ready pistols. Similarly, a proper mill job is critical for durably mounting optics directly to pistol slides. I should also point out that it’s not just about the tolerance of the mounting screw holes, but also the recoil lugs. The cycling of a slide on a pistol is punishing on the optic and the mount’s contact points. From what I’ve gathered it is the stress from the recoil on the mounting screws that causes the screws to either walk out or shear off. The recoil lugs and additional slide or adapter material that surrounds the optic itself help to reduce the amount of stress experienced by the mounting screws.
The installation process is just as important as good hardware. It’s not a complicated process, but it does require a bit of time and some specialized tools.
The installation process begins with clean and dry surfaces that are free from lubricants and solvents. Using a degreaser on the screws and screw holes is a good idea. The reason is that any remaining solvents or lubricants that remain on the threads reduce the friction that is found from metal on metal contact and can prevent proper thread locker binding. In turn, skipping this step increases the likelihood of having the mounting screws loosen and begin to walk out as the pistol slide cycles back and forth.
Once the mounting surfaces and hardware are clean, dry, and free from solvents and lubricants, we can mount the hardware. The key is to ensure that the screws are inserted with sufficient torque to hold in place but without stripping the head. The torque specifications are commonly found in user manuals or can be obtained by contacting the manufacturer. Applying the proper torque will require the use of an accurizing torque wrench capable of measuring inch/pounds. My favorite is the F.A.T. wrench from Wheeler Engineering. It’s also a good idea to add a small drop of blue threadlocker (such as Loctite 242). The best way I have found to apply it is to put a drop of the threadlocker on the tip of a toothpick and use the toothpick to apply it to threads of the screw furthest away from the head of the screw. This will allow the threadlocker to work its way along the threads up the screw as it is inserted.

The final step is to let the threadlocker cure. Wait a full day, that’s a full 24 hours, before shooting the gun or manipulating the gun. This ensures the threadlocker dries and bonds with the surfaces properly. I completely understand the urge to fiddle with the pistol and the optic right after installing it. I also completely understand the desire to immediately go to the range, zero the optic, and start practicing with it. Patience is a virtue and, in this case, your friend that will help avoid a mounting failure down the road.
The final component in avoiding mounting failures is to routinely inspect the optic to ensure it remains properly mounted. This is where those witness marks come in. If the optic is loose or witness marks have lost alignment, then it is time to get the pistol back to the workbench and fix it. Fixing it means detaching the optic, inspecting the hardware, replacing (or repairing) things that need replacing (or repairing), and performing the installation process again. This should not be a common ordeal assuming quality hardware was used and the proper installation process was followed.
I suspect some folks might be thinking this type of failure is another piece of evidence in support of sticking with iron sights only. I don’t share this view. According to what I’ve heard from instructors, iron sight mounting failures also occur at about the same rate that optic mount failures occur and those failures can also be avoided with good hardware, proper installation, and periodic inspection. I should have probably mentioned this somewhere near the beginning of the post as it’s likely those folks didn’t read to the end. C’est la vie.


5 responses to “Avoiding Red Dot Mounting Failures”
[…] one also must ensure that the optic is mounted properly and remains in that condition in order to avoid potential mounting failures. That means making sure the screws are properly torqued, using threadlocker, applying witness marks […]
[…] its last review. The most notable change is how the optic is mounted which came about because of multiple optic mounting failures which continued even after replacing the H&K optic mounting plate and trying different Trijicon […]
[…] I started putting in some work with the Shadow 2 Compact. The one mistake I made was not following my optic mounting procedure which resulted in the RMR coming loose. This was a blessing in disguise, I think, as it provided me […]
C’est la vie.
Having had the front sight fall of my Bul Cherokee once, and the screws holding my Holosun SCS to my Gen 5 G34 MOS sheering off, I can at least give some anecdotal support to support your last paragraph. Bul fixed my Cherokee and I had my gunsmith drill out the mounting screws on my G34 (which I may have over-torqued before I got my Fixit Sticks), I have had no problems with either gun.
Personally, although I try to get in some practice with irons, I’ll stick to dot sights, thank you very much. 🙂