
About a month ago, one of the instructors from Outrider Training Group shared a thread on twitter where he broke down what a typical dry fire session looks like for him and his thought process. I thought it was a fantastic thread and threatened to steal his idea and do the same. As I started working on that, I realized that a thread on Twitter was a bit too restrictive. Additionally, I remembered I wrote a post last year around this time where I shared what my dry fire regimen was (which has evolved quite a bit). As such, a follow up post seemed like a better idea and here we are.
Fair warning, there is a lot I want to say about dry fire and I intend to get into the weeds of what a typical session looks like for me nowadays. Expect this post to be lengthy and long winded. However, I think there is value in this exercise that at least one person who reads this will find beneficial.
First things first. Dry fire is an activity that should have a plan that is tailored specifically to one’s own skill level and goals in the very same way one needs to tailor a diet or an exercise plan. That is, a bad plan isn’t necessarily better than no plan as it can ingrain bad habits that later have to be unlearned and replaced with better habits. Those bad habits will be suboptimal techniques at best and unsafe practices at worst. The best way to develop a good plan is through attending an appropriate level class or getting some one-on-one coaching from a high quality instructor. Alternatively, reading an authoritative book or two on the subject is another good place to start. This post isn’t one of those, but if y’all express interest, then I may dedicate one or more posts specifically to that.
With that out of the way, let’s dive into what a typical dry fire session looks like for me nowadays.
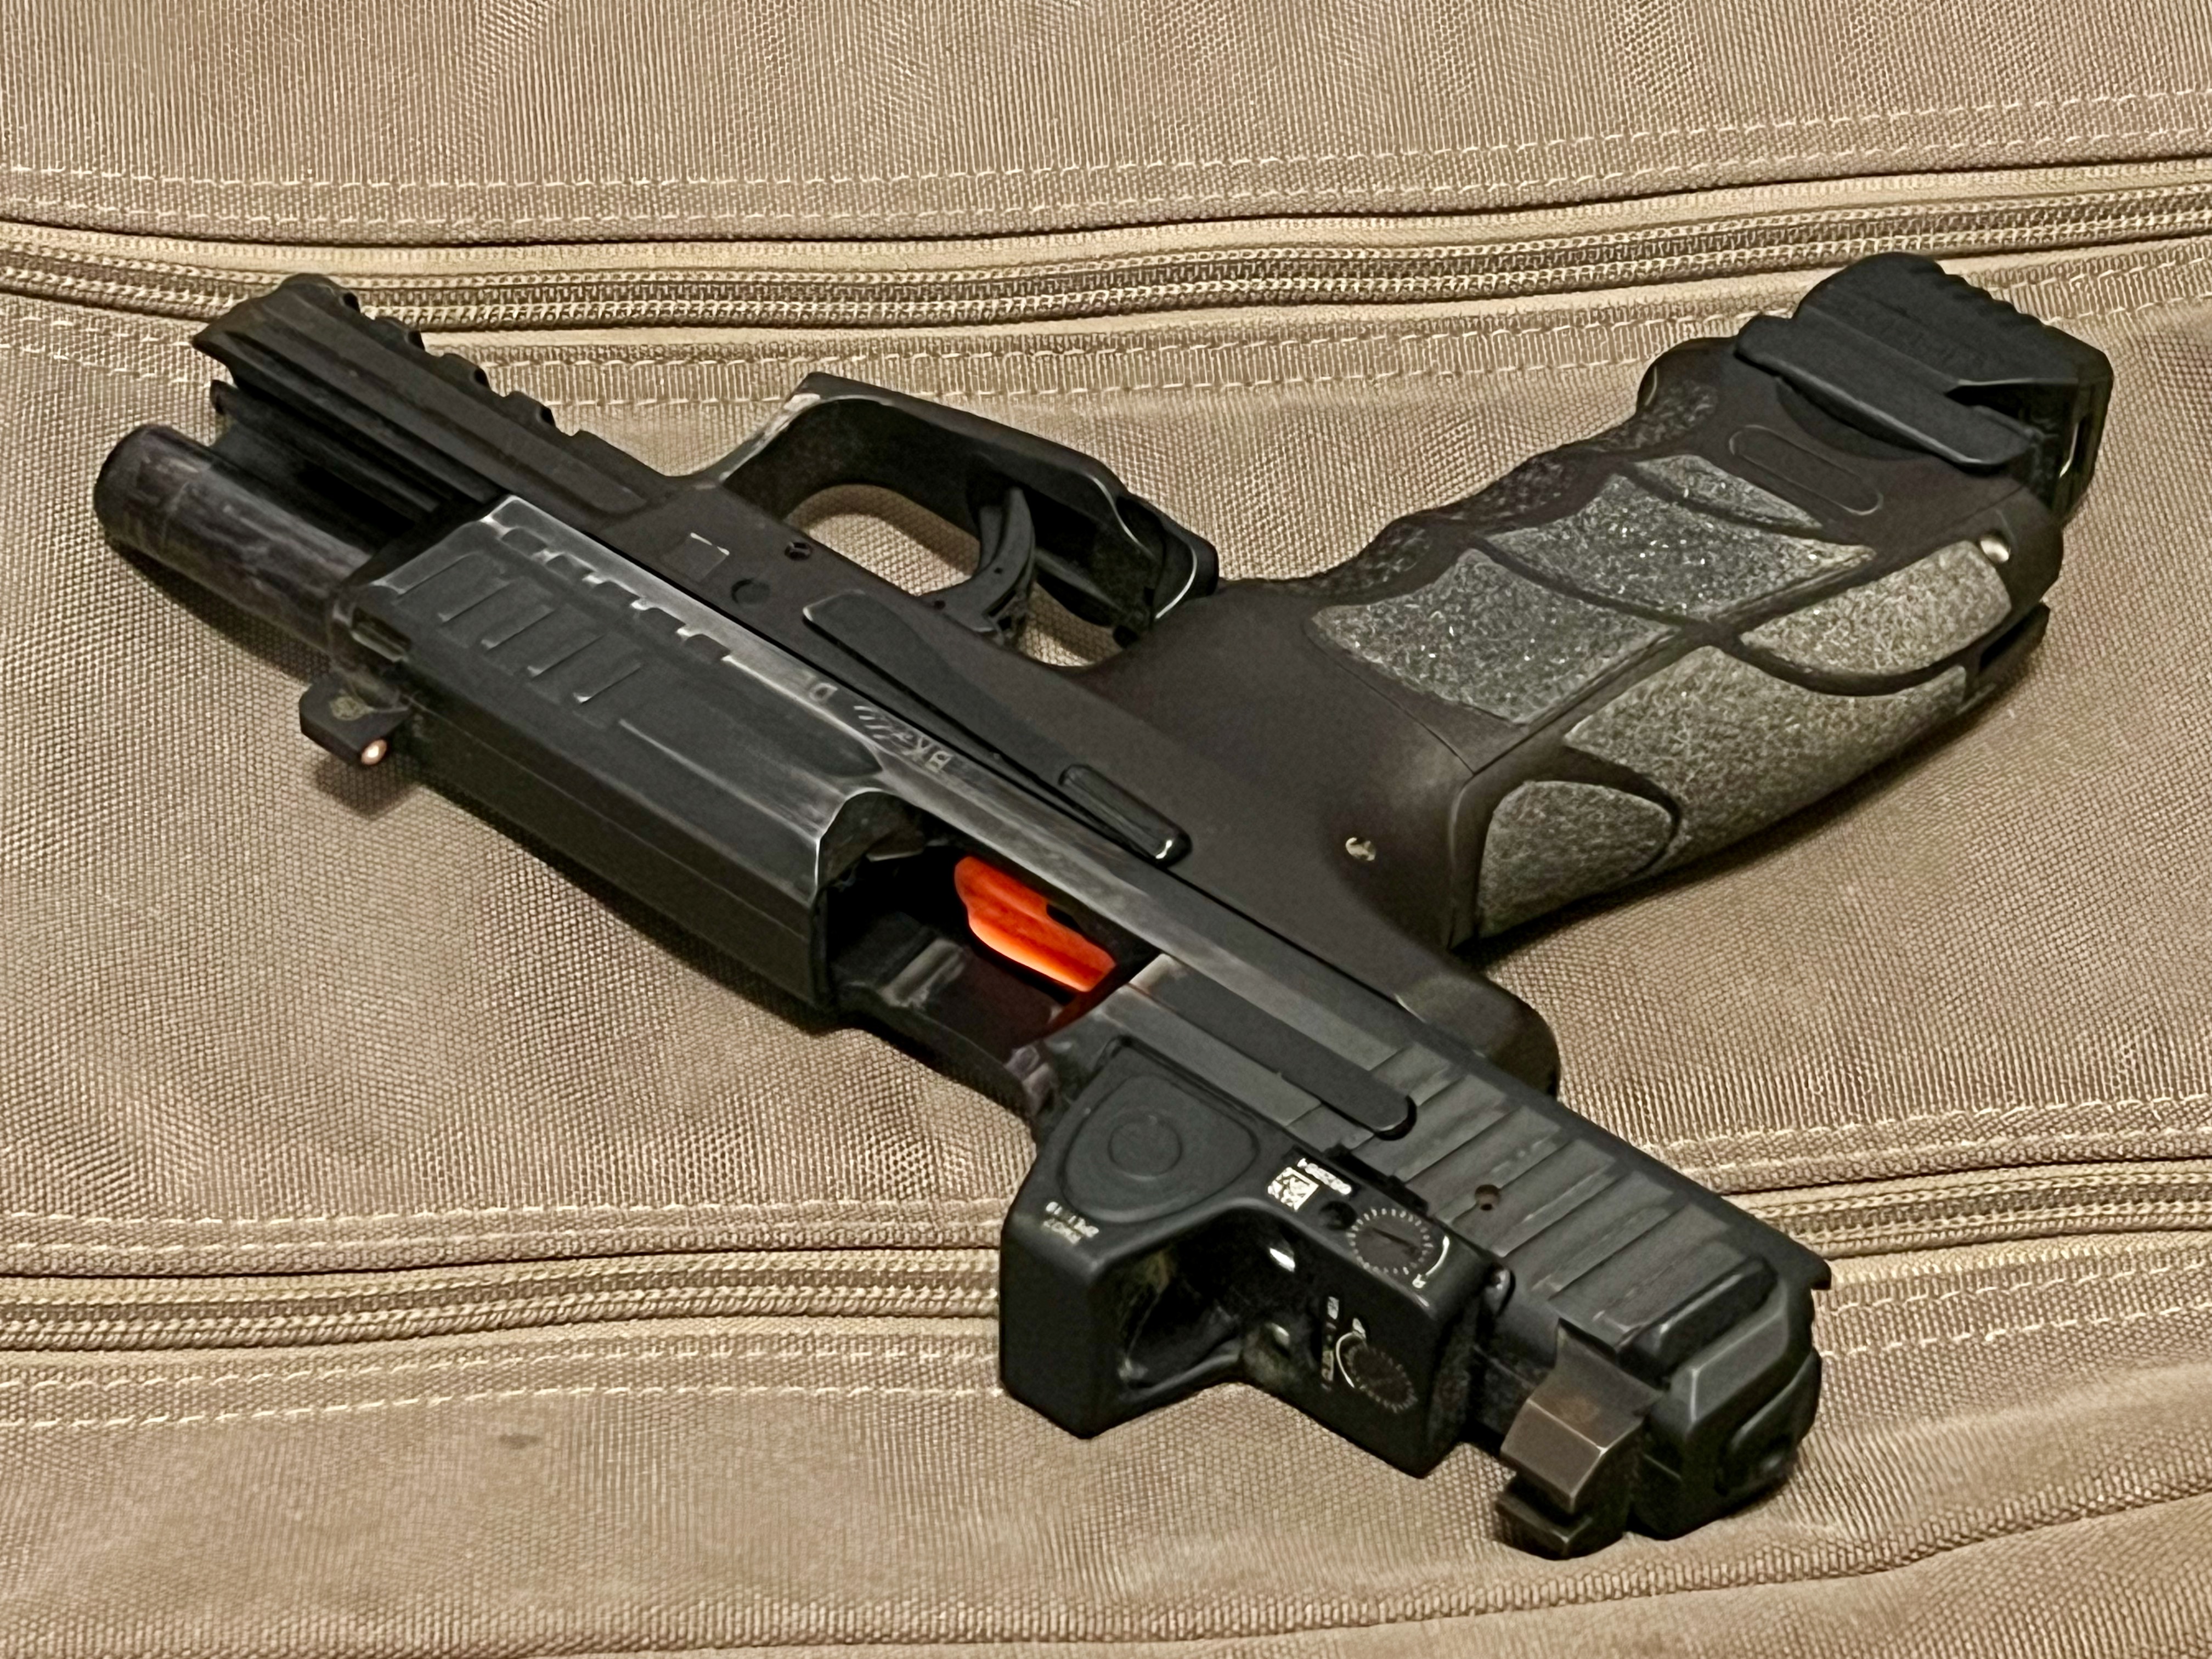
In terms of equipment, my typical dry fire (or dry fire practice or dry practice depending on preferred nomenclature) session usually involves my EDC (every day carry) gear entirely or at least begins with it. There are plenty of sessions where I will switch out to my competition gear, but that is almost always after I’ve done some work with the EDC equipment. Why? It’s simple really. While I participate a good bit in competitive shooting sports, I think it’s prudent to keep skills that I may use to defend my life or the life of those who are most dear to me as sharp as possible. As such, those skills take priority over everything else. I like to think of it as eating my vegetables first. For those of you who are new around these parts, the EDC gear consists of the RMR equipped VP9 in the Incog Eclipse IWB (inside the waistband) holster concealed under a t-shirt on my strong side. The VP9 is cleared and I insert an unloaded magazine with a 9mm MagBlok inserted and outfitted with a Mantis MagRail magazine floor plate rail adapter with the Mantis X10 attached to it. I also make heavy use of reduced size IDPA targets in my sessions.
I like to start out my sessions with the Mantis X intermediate level Hostage Rescue drill, which is a draw to first shot drill in 2.5 seconds. I do this from concealment with a goal of getting 10 good hits from the holster in under 2.5 seconds. This can be done with a shot timer using a delayed start and 2.5 second par time. I don’t always get 10 out of 10, but that’s what I’m aiming for. The idea here comes from the premise that in a defensive encounter the person who gets the first good hit is more often than not the victor of the gunfight. That means that it behooves the self defender to get the gun into action quickly and make that first shot count. It’s also important to know how well one can do that on demand from a cold start. Sure the 2.5 second time limit isn’t as sexy as the 1 second draw to first shot folks may have heard about, but it’s still a challenging time given a moderately difficult target, such as a 10 yard head shot, which is what I’m after with consistency. I also use the results from this exercise to determine what to work on next. If I can beat the par time with a quality shot demanded by the Mantis X drill 8 out of 10 times or better, then I move on to work on other things. If I can’t, then I put in some work to tune up that “draw to first shot” using this dry fire drill I’ve written about before.
Once I’m happy with my “draw to first shot”, I do some trigger control work using a two handed grip, strong hand only grip, and weak hand only grip. Once again, I like to make use of the Mantis X10 for this with the MantisX Benchmark drill, Primary Hand Only drill, and Support Hand Only drill. These drills are not timed. They only require getting a good sight picture and pressing the trigger straight back without disturbing the sight picture. Alternatively, one could do penny drills, which consist of balancing a penny on the front sight, getting a good sight picture, and pressing the trigger while keeping the penny balanced on the front sight. In my opinion, having a fantastic trigger press while maintaining a good sight picture allows one to get a good hit on very extremely difficult targets. While it is exceedingly rare that a self defender will need to make a very difficult shot, such as a 25 yard A-zone hit one handed using only the support , it makes less difficult target hits, such as a two-handed 10-yard head shot, trivial. Given pistol marksmanship is a perishable skill, doing maintenance work like this just makes sense. So I do a little of it. Every day.
The role of the Mantis X in these drills is to keep me honest. What I mean by this is that I look to see if the MantisX provides a score to match the shot I called. If I call a shot good and the Mantis provides a low score, then that tells me that I may have to put in some work into my shot calling abilities. I don’t care much for the corrective feedback, but I do pay attention to why the shot score disagreed with my call. Discrepancies between my call and the shot score indicate that I may not be applying sufficient visual awareness or perhaps that the Mantis X is not configured properly. It’s an additional feedback tool that is very objective given it measures muzzle movement that I should be able to notice.
The next thing I usually work is transitions. More specifically, I work on transitioning from one difficult shot to another difficult shot on another target. To do this, I combined an adapted “Sights Meet Trigger 2” drill I picked up from Gabe White’s Pistol Shooting Solutions course with the Compressed Surprise Break drill on the Mantis X.
Let’s back up a bit and look at those two drills individually first. Gabe White’s “Sights Meet Trigger 2” drill starts with the trigger pressed all the way to the rear and the slide charged while the sights are level on the previously shot target. When ready, the eyes move to the second target, the pistol follows while the trigger is reset and prepped for the next shot and the trigger breaks as the sights arrive on the new target. In of itself, this drill is a great way to practice transitions. The Compressed Surprised Break drill on the Mantis X consists of starting with the slide charged and the trigger prepped. On the go signal, one breaks the shot as quickly as possible while looking to achieve a good shot score. By itself, the drill is really good at helping one develop a rapid and good trigger press to a stimulus.
Combining the two drills, I begin with the trigger pressed to the rear and slide charged with the gun leveled on the “previously shot target”. On the go signal from the Mantis X Compressed Surprise Break, my eyes move to the next target, the gun follows while I reset and prep the trigger, and I break the shot as the sights arrive on target. I am looking for a good shot score with a fast time. My thought process behind this is that if I can get good at transitioning and putting a good hit on a difficult target quickly, then easier transitions should be a walk in the park. So far, this strategy along with the work I’m putting into it has been paying solid dividends on USPSA classifier stages.
After “eating my vegetables”, I will often swap out the EDC gear for competition gear and put in some work with it. What I do here depends a lot on what specific practical marksmanship skill I’m focused on improving. This is sometimes specific to the posted stages of an upcoming match or based on something I struggled with at a prior match. Sometimes this includes using the Mantis X. Other times it doesn’t. It simply depends.
There are a number of questions I often ask myself. Such as, “are the tools I’m using helping me or holding me back?” And also, “is what I’m practicing helping me improve at the optimal rate?” I’m certain that folks who have attained a higher level of proficiency have better answers to those questions that I do. As such, I’m constantly seeking feedback from those folks and adapting my practice to the feedback they provide. The only thing I know for certain is that putting in the work is critical and essential to skill development. Additionally, it’s important to tailor the work we put in to match our current skill level and the goals we want to achieve. To that end, objective measurement is invaluable. If you’re not measuring, then start. If you don’t have a measurement tool, then start with a shot timer. Other dry fire aids, like the Mantis X, might also be beneficial, but a good shot timer is indispensable.
Now, get to work.


3 responses to “A Dry Fire Session”
[…] shared my dry fire session post with my good friend, the instructor at Outrider Training Group, who inspired it. Or who I stole the […]
[…] A Dry Fire Session (Uncle Zo) […]
[…] A Dry Fire Session […]