In self defense or competitive contexts, the time between drawing a side arm to putting the first shot on target matters. As such, it makes sense to put in some work on improving it. The best way to do this, as far as I am aware, is through dry practice.
To get started, find a nice quiet place where you can safely draw an unloaded side arm. Put up a target (a B-8 target is a good option) and make sure there is a good backstop behind it. Make sure the side arm is unloaded and cleared. It’s a good idea to keep all live ammunition in a separate room to avoid negligently loading the firearm and discharging around while practicing. Once the dry practice area is ready, the firearm has been unloaded, and ammunition safely stored away, go ahead and reconfirm the firearm is clear.
Once ready, one can begin dry practice.
Basic dry practice drill
I’m sure there is a name for the drill I am about to present, but I don’t know what it is so I will spell out the steps to follow:
- Draw the firearm from concealment to full presentation
- Aquire the target with sights aligned
- Press the trigger
- Reset and repeat
Starting with a few repetitions of the drill in a very slow manner. If able to, record a video of the drill and watch it help identify unnecessary movement. How many reps should one do? It depends on how much time one has, but the more the merrier.
It’s important to remember that slow repetitions will build muscle memory so make certain one pays attention to all the steps. While drawing the pistol, make sure to start with a good grip and consciously eliminate any unnecessary movement while presenting the firearm. Pay attention to your shoulders, elbows, and support hand, they shouldn’t move any more than they have to. Try to minimize the motion of the muzzle when acquiring and aligning the sights on the target while pressing out the firearm to full presentation. Pay attention during the trigger press to verify the sights stay aligned with minimal movement. Practice safely holstering the pistol when reseting.
The key here is to take your time. Perfect practice makes perfect. Incorrect practice builds bad habits that will take additional work to break later.
The basic slow form of this drill will improve your overall time from drawing a pistol to getting the first shot on target.
Speed it up
Once warmed up and feeling good about the drill, we can add some reps with speed. How fast you should go depends on your current skill level. It’s more important to perform the drill correctly than quickly. Speed will come with time and practice. It’s also a good idea to record a video again to review and evaluate the performance. Look for unintentional and unnecessary movement that was introduced when speed was added and make a note to work on eliminating those movements.
Optionally, one can make use of a shot timer to introduce a reaction stimulus to start the drill and a par time beep to measure speed. What par time should one start with? Again it depends on skill level. Start with a reasonable par time, like 3 seconds, and perform the drill a few times against it. Remember the goal is to perform the drill correctly. If the par time is too long, reduce it by a one or two tenths of a second and try again a few times. Once the correct par time is identified, use it as baseline to work some repetitions of the drill against it.
Whether using a shot timer or not, it’s a good idea to work in a few reps at speed. For people new to this drill, it’s probably better to focus on the basic drill to get good muscle memory in. For more advanced shooters, it’s still a good idea to warm up with the basic drill before focusing on the drill at speed. For those somewhere in between novice and advanced, use your best judgement to either focus more on the basic drill or the drill at speed.
How good is good? I’ve been told by a couple of different firearms trainers that an average shooter should be able to draw and put a shot on target in about two seconds. I suggest that those with a par time is over two seconds with good form should consider themselves beginners and should therefore focus more on the basic drill maybe using the 80/20 rule where only 20 percent of dry practice time is spent working on speed.
On the other hand, the Tueller Drill suggests that a threat within 21 feet can reach a defender in about 1.5 seconds. With that in mind, I suggest considering those with a 1.5 second par time an intermediate shooter and should therefore consider splitting dry practice time on this drill using a 50/50 rule where 50 percent of time is spent working on speed.
Finally, the shooters I consider to be advanced have a par time of one second or less. If you are there, then you probably have better advice to offer than I do. But I venture to guess that the 80/20 rule applies where 80 percent of the time is spent working on speed.
Add a little fire
I’ve introduced this drill as a dry practice drill because most ranges I have access to will not permit shooters draw and fire from a holster. However, this drill can be modified to use live fire. If you are one of those who is lucky enough to have a range where you can draw and fire from a holster, then I encourage you do so after having the basic dry fire drill down. Remember, safety always comes first with fire arms.
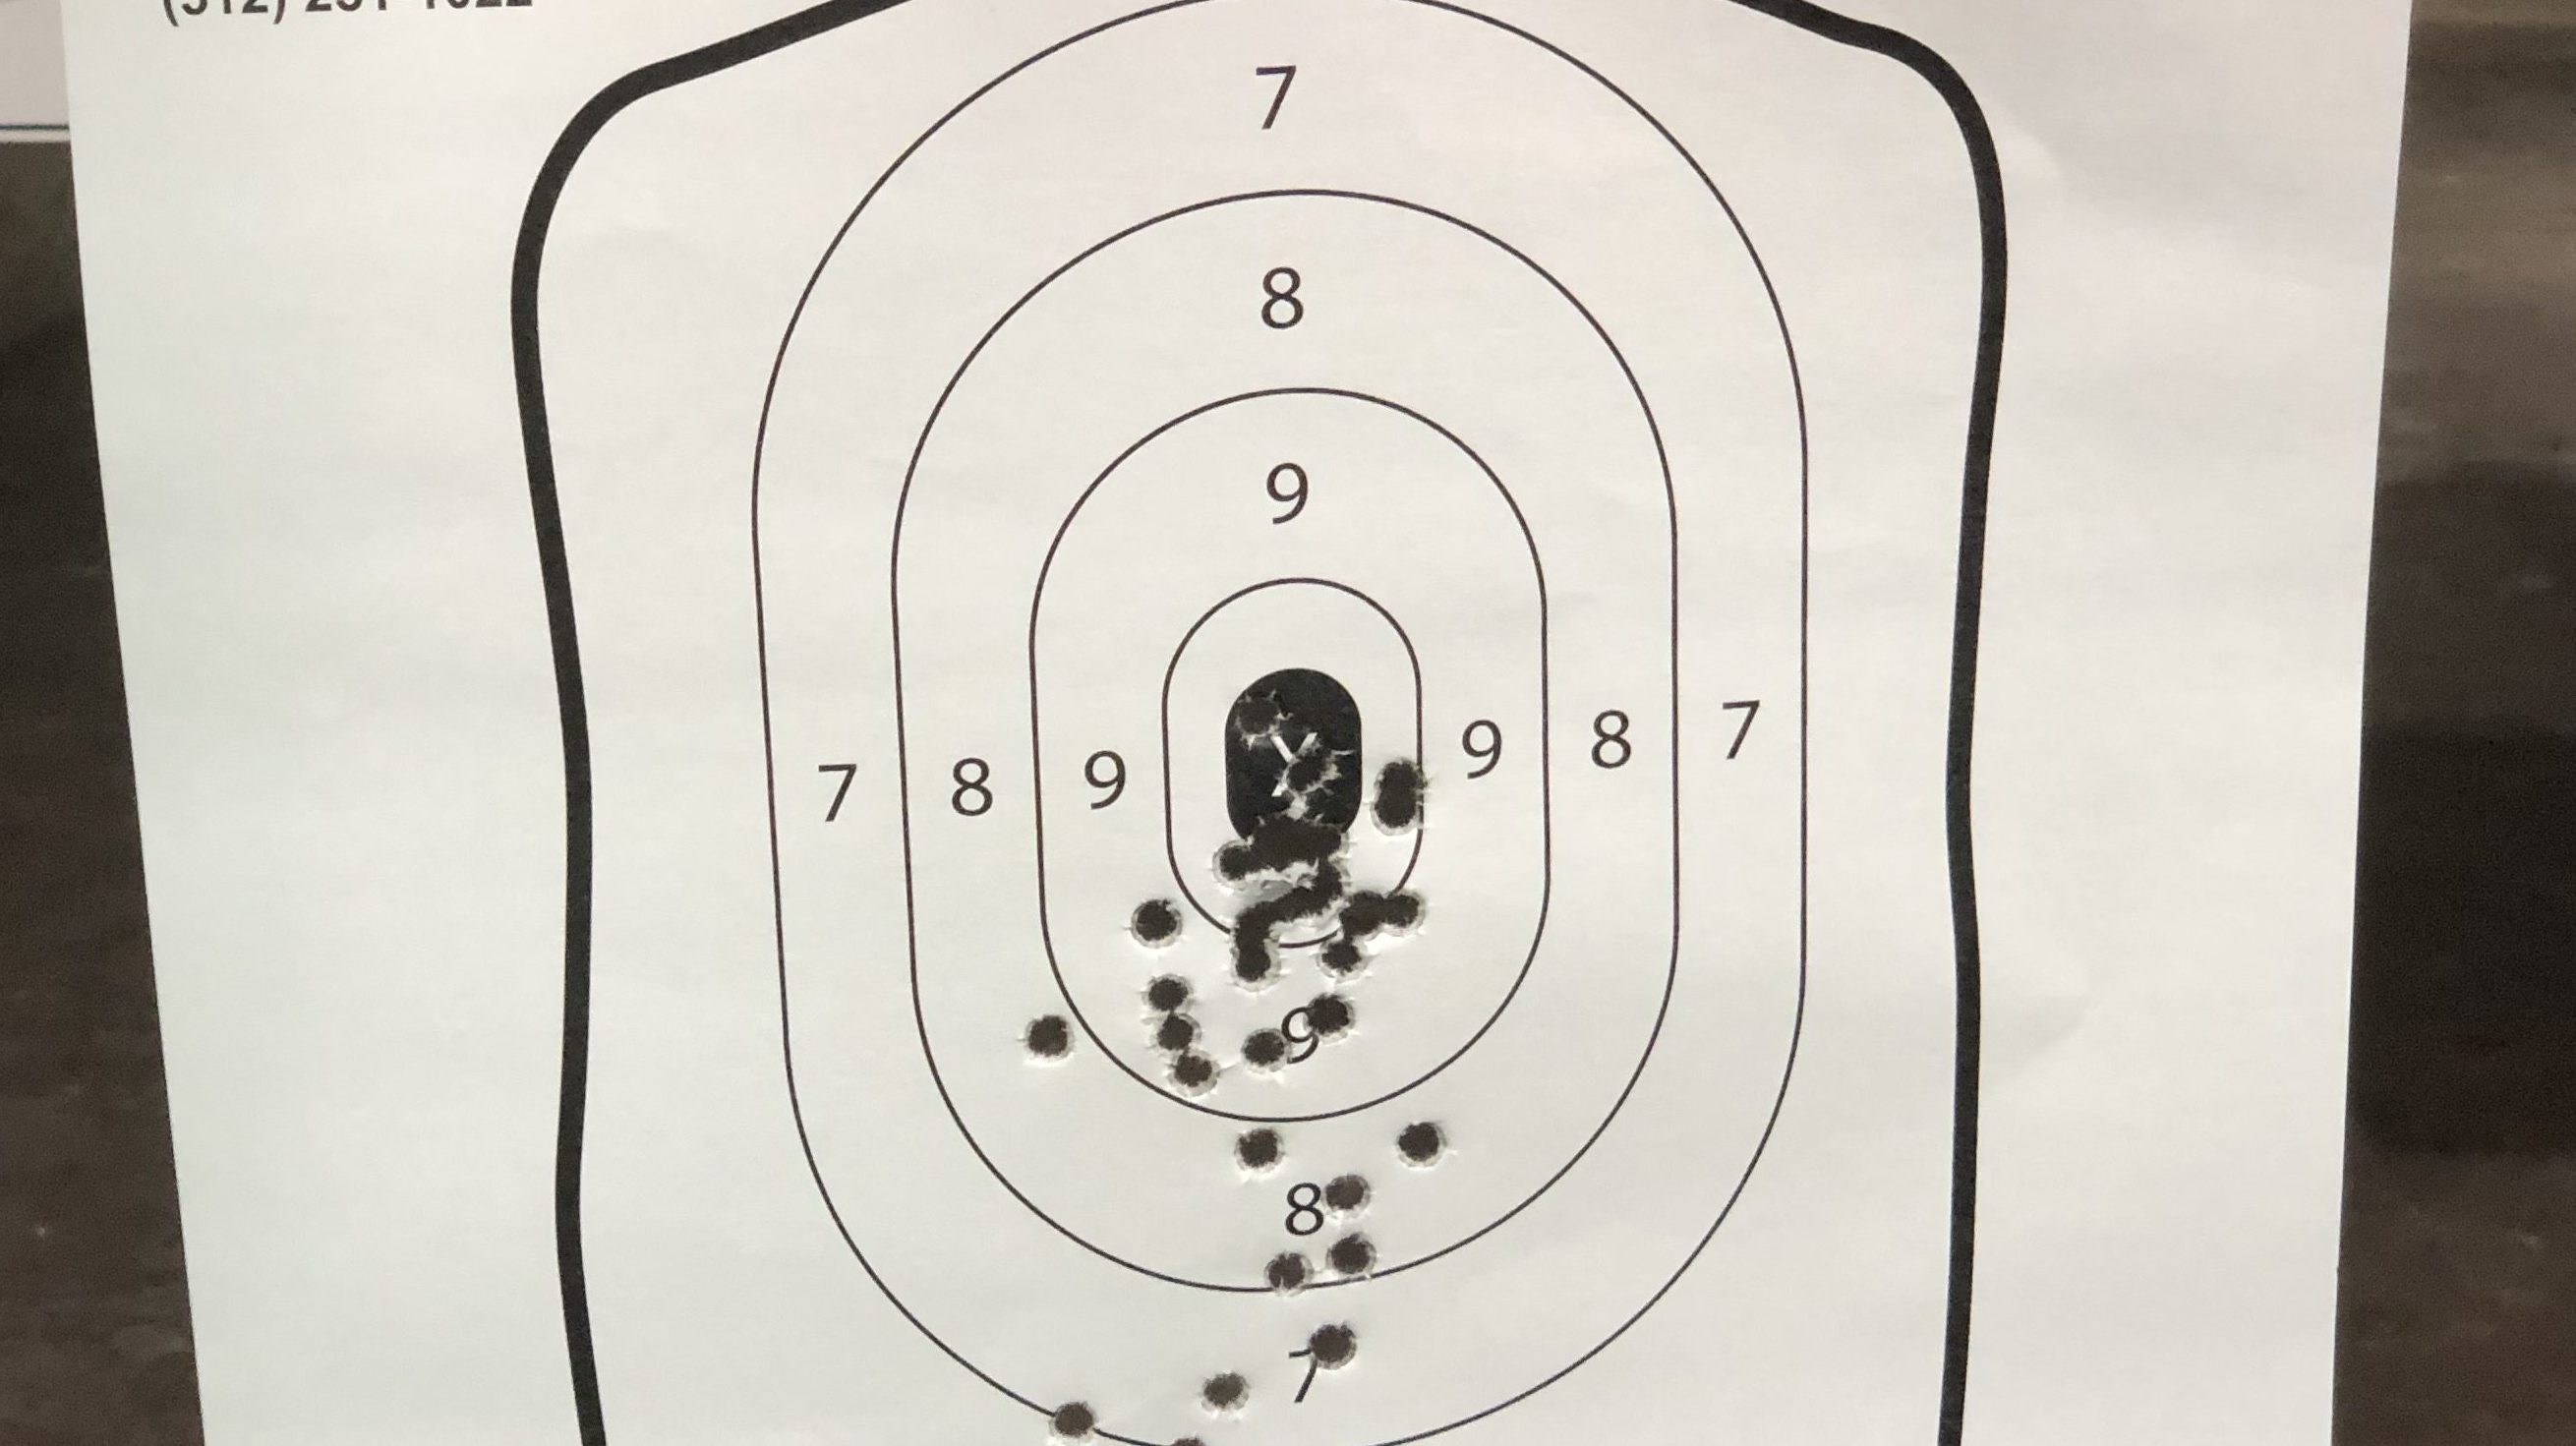
If you want to take this drill a bit further with live ammo and have access to a shot time, try this version of the drill: from 3 yards draw and place 3 shots on a B-8 target in under 3 seconds. Too easy, then increase the difficulty by increasing the distance, increasing the on target shot count, or decreasing the time limit. Don’t forget correct form continues to trump speed. While the goal is to decrease the time from drawing to putting a shot on target, correct form will lead to the fastest possible time with the best accuracy over time.
Drill variations
A full presentation of the firearm is not always required to put a shot on target. At arms length, one can and should probably draw and shoot from retention. For targets only a few feet away, one should probably draw and shoot from a compressed ready position.
This drill can be modified to practice those other shooting positions. Simply, modify step one to draw the pistol to the shooting presentation one wants to train. Again, I suggest first placing the emphasis on drawing and pressing the trigger correctly over speed to develop good muscle memory first and then working on speed.
Other variations to consider:
- Drawing to first shot from a seated position
- Drawing to first shot with strong hand only
- Drawing to first shot with support hand only
What other variations can you think of?